A clean kitchen floor is not just about aesthetics; it's also about creating a healthy and safe environment. Whether you have tile, hardwood, laminate, or vinyl, cleaning your kitchen floor properly can prevent grime buildup, extend its lifespan, and make your home feel fresh. In this comprehensive guide, we'll dive into how to clean your kitchen floor with ease, no matter the material, and leave it sparkling. Let's get started with some practical tips and expert advice!

Understanding Different Kitchen Floor Types and Their Cleaning Needs
Before diving into cleaning, it’s essential to understand the different types of kitchen flooring. Each material has its own set of care instructions, and knowing what works best for each type will make the process smoother and more effective.
Tile Floors: Durability Meets Elegance
Tile floors are one of the most popular kitchen flooring choices due to their durability and aesthetic appeal. Ceramic, porcelain, and stone tiles are all common options in kitchens. These floors are resistant to stains, scratches, and moisture, but grout can often be a problem area. Over time, dirt and grease can build up in grout lines, causing discoloration.
How to Clean Tile Floors
- Sweep or Vacuum: Start by removing dust, dirt, and debris. A broom, dust mop, or vacuum cleaner (with a soft brush attachment) works well.
- Mop with the Right Cleaner: Mix warm water with a mild floor cleaner or dish soap. For a deeper clean, you can add a bit of vinegar, but avoid using too much, as vinegar can be harsh on grout over time.
- Scrub the Grout: For grout lines, use a grout brush and a cleaning solution made of baking soda and water. Scrub gently to avoid damaging the grout.
- Rinse and Dry: After mopping, rinse the floor with clean water to remove any soap residue. Dry the surface with a soft cloth or towel.
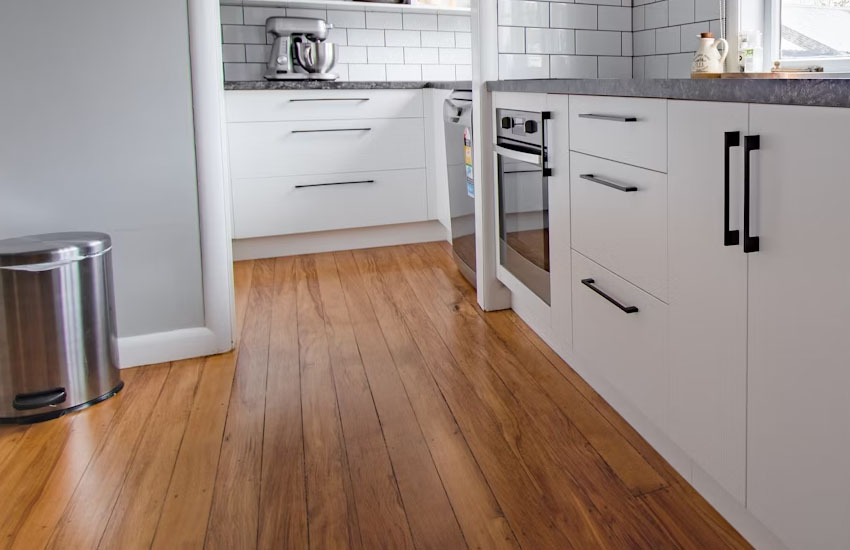
Hardwood Floors: Classic and Timeless
Wooden floors bring warmth and charm to any kitchen. However, cleaning hardwood can be tricky since too much water can warp the wood. Plus, harsh chemicals can dull the finish.
How to Clean Hardwood Floors
- Dust and Sweep: Dusting off crumbs and dirt is essential. Use a microfiber mop or broom to clean up.
- Mop Sparingly: When mopping hardwood floors, use a damp mop—not a soaking wet one. A mixture of water and mild dish soap or a cleaner specifically designed for wood works best.
- Tackle Stubborn Spots: If there are sticky spots or food stains, use a damp microfiber cloth with a tiny bit of dish soap. Never scrub with anything abrasive, as this can scratch the surface.
- Polish for Shine: Every once in a while, use a wood polish to keep the floors shining and to maintain the protective finish.
Laminate Floors: Affordable Yet Stylish
Laminate floors are known for their versatility, mimicking the look of wood, tile, or stone. They're low-maintenance but can be susceptible to water damage if not cleaned properly.
How to Clean Laminate Floors
- Sweep Regularly: Just like with tile or hardwood, start by sweeping or vacuuming to remove debris.
- Use a Damp Mop: Laminate floors shouldn't be soaked, so make sure your mop is just damp. You can use a solution of water and vinegar for an effective, streak-free clean.
- Avoid Harsh Cleaners: Never use wax, polish, or abrasive scrubbing pads on laminate floors. These can leave a residue or damage the surface.
- Tackle Spills Immediately: Wipe up spills immediately to avoid water damage or stains. Since laminate is sensitive to moisture, don't let water sit for too long.
Vinyl Floors: Low-Maintenance and Budget-Friendly
Vinyl floors are incredibly durable and water-resistant, making them ideal for kitchens. They’re also easy to clean, which is a major bonus for busy homeowners.
How to Clean Vinyl Floors
- Sweep or Vacuum: Start by sweeping away any debris or crumbs. A vacuum with a hard floor setting works great for vinyl.
- Mop with Mild Soap: Mix warm water with a gentle dish soap to clean the surface. For extra shine, you can add a bit of vinegar to the mixture.
- Spot Clean Tough Stains: If you encounter sticky spots or stains, use a non-abrasive cleaner and a soft cloth to scrub them away.
- Rinse: Once you've finished mopping, rinse the floor with clean water to remove any soap residue.
By understanding the material of your kitchen floor, you can choose the best cleaning methods to keep it looking as good as new. Whether you're dealing with grout on tile or moisture on hardwood, each type of flooring requires a specific approach for optimal results.
Step-by-Step Guide on How to Clean Kitchen Floors
Cleaning your kitchen floor doesn’t have to be overwhelming. With the right tools and a step-by-step approach, you can keep your floors spotless with minimal effort. Here's a foolproof method for cleaning your kitchen floor, no matter what surface you have.
Step 1: Gather Your Supplies
Before starting the cleaning process, make sure you have the necessary supplies. Here's what you'll need:
- Broom or vacuum cleaner (with a soft brush attachment)
- Mop (microfiber or string mop)
- Bucket for water
- Floor cleaner appropriate for your floor type (mild dish soap, vinegar, or a specialized cleaner)
- Microfiber cloths or towels for drying
- Grout brush (if you have tile floors)
- Optional: Floor polish or shine enhancer
Step 2: Sweep or Vacuum
The first step in cleaning your kitchen floor is to remove all dirt, dust, and crumbs. This will prevent you from just moving dirt around when you mop. Sweeping with a broom works well for larger debris, but using a vacuum cleaner will pick up more dust and smaller particles. Use a vacuum with a hard floor setting to avoid damaging the surface.
Step 3: Prepare the Cleaning Solution
For tile and vinyl floors, a mix of warm water and a mild floor cleaner works great. For hardwood, be sure to use a cleaner specifically designed for wood floors. For laminate floors, avoid any cleaner with waxes or abrasives. If you’re going for a natural solution, you can use a mixture of water and vinegar for a streak-free shine (just avoid using too much vinegar on wood).
Step 4: Mop the Floor
Once the cleaning solution is ready, dip your mop into the bucket and wring it out so it's damp—not soaking wet. Start mopping at one corner of the kitchen and work your way to the exit, so you don't step on the freshly cleaned floor. For stubborn stains, apply a little more pressure, or use a scrub brush for tough spots.
Step 5: Dry the Floor
Once you've mopped the entire area, it's essential to dry the floor. For tile, use a microfiber cloth or towel to dry off any excess water. For wood floors, a damp mop is okay, but avoid leaving standing water that could warp the wood. Drying helps avoid streaks and ensures the floor's surface stays in good condition.
Step 6: Regular Maintenance
To keep your kitchen floor clean, regular maintenance is key. Sweep or vacuum daily to remove crumbs and debris, and mop weekly to prevent buildup. For high-traffic areas, consider a more frequent cleaning schedule to maintain a fresh, hygienic kitchen.
Tips and Tricks for Efficiently Cleaning Your Kitchen Floor
While cleaning your kitchen floor is a straightforward task, a few tips and tricks can help you achieve better results and save time.
1. Use Microfiber Mops for Better Dirt Pickup
Microfiber mops are fantastic for picking up dust, dirt, and grime. Unlike traditional string mops, microfiber pads attract dust and can hold more dirt, making them more effective at cleaning. They also require less water, which is a bonus for hardwood floors.
2. Make Your Own Natural Cleaner
Instead of relying on commercial cleaning products that may contain harsh chemicals, you can create your own natural floor cleaner. A simple mix of water, vinegar, and a few drops of essential oil can be a great option. It's cost-effective and safe for both your family and the environment.
3. Prevent Damage by Using Rugs and Mats
Prevent dirt and grime from entering your kitchen by using rugs and mats in high-traffic areas, especially near the entrance. This can help minimize the amount of dirt that reaches your floor, reducing the frequency of deep cleanings.
4. Tackle Spills Immediately
When you spill something on your kitchen floor, cleaning it up immediately is essential. The longer spills sit, the harder they become to clean, and the higher the risk of stains or water damage (especially for hardwood floors).
Frequently Asked Questions
Is it safe to use vinegar on hardwood floors?
Yes, vinegar is a great natural cleaner, but it should be used in moderation. Too much vinegar can damage the finish on hardwood floors. A diluted mixture of vinegar and water is the safest option.
Can I use a steam mop on tile floors?
Yes, steam mops are a great option for cleaning tile floors as they effectively lift dirt and sanitize the surface. Just make sure your grout lines are sealed, as moisture can seep into unsealed grout.
Do I need a special cleaner for laminate floors?
No, you don't need a special cleaner, but you should avoid using cleaners with wax or abrasives. A mild soap-and-water solution works perfectly for laminate floors.
Is it okay to use a broom on hardwood floors?
Yes, using a broom is fine for hardwood floors, but it's best to use one with soft bristles to avoid scratching the surface. A microfiber dust mop works even better for daily cleaning.
Can I clean my kitchen floor without harsh chemicals?
Absolutely! You can clean your kitchen floor with natural solutions like vinegar, baking soda, or mild dish soap. These are safe and effective alternatives to commercial cleaners.
Is it necessary to rinse after mopping the floor?
Yes, it's a good idea to rinse your floor after mopping to remove any soap or cleaner residue. This prevents sticky or cloudy spots from forming on the surface.
Do I need to polish my kitchen floor?
While polishing isn't necessary for all floor types, it can be beneficial for wood and vinyl floors to maintain their shine and protect the finish. Use a polish designed for your floor type and follow the instructions.
Can I use a regular mop on vinyl floors?
Yes, you can use a regular mop for vinyl floors. Just be sure it's damp and not soaking wet, as excessive water can cause damage to the floor.
I hope this article helped you understand how to clean your kitchen floor efficiently and effectively. Whether you have tile, hardwood, laminate, or vinyl, with the right approach and tools, your kitchen floor can stay spotless and last longer. Happy cleaning!