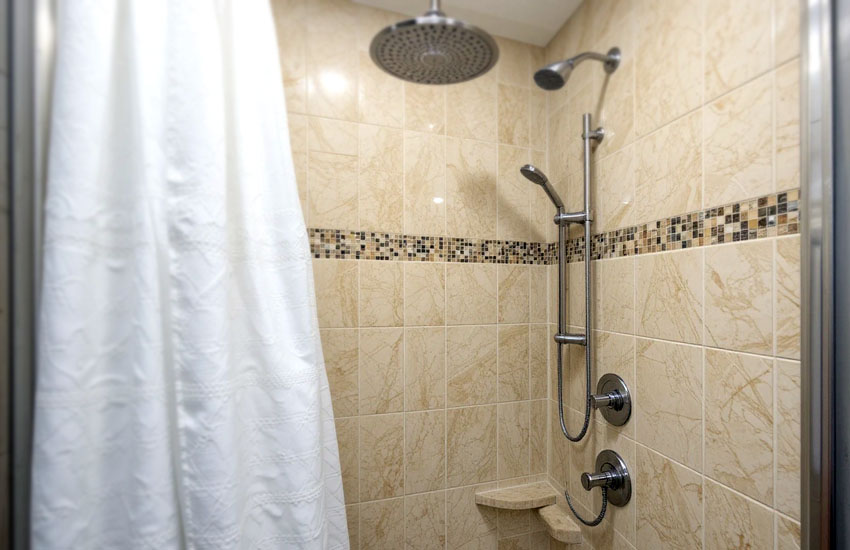
Water drips from the showerhead, and you notice tiny dark lines creeping between your tiles. Ugh, grout! It's stubborn, annoying, and somehow always finds a way to look dirty. You grab a brush, sigh, and wonder if it will ever look clean again. In this article, we'll tackle the problem together in a simple way that actually works.
Cleaning grout doesn't have to be a nightmare. With the right tools, gentle cleaners, and a bit of elbow grease, you can restore your tiles' shine quickly. Avoid harsh chemicals that can damage your grout. Focus on small sections for better results and prevent future buildup by sealing grout properly. Using natural or homemade cleaners is safe, effective, and affordable. Maintaining a weekly cleaning habit keeps your shower fresh and prevents stubborn stains.
Identify Grout Type and Gather Materials
Before scrubbing or spraying anything, it's important to understand what kind of grout you have. There are two main types: sanded and unsanded. Sanded grout has tiny grains that make it durable and easy to scrub. Unsanded grout is smoother and softer, often used in smaller tile spaces. Knowing your type helps choose the safest cleaning method.
Next, gather your supplies. You'll need a soft brush or an old toothbrush, a sponge, a spray bottle, gloves, and the cleaner you'll use. You can choose a store-bought grout cleaner, a baking soda paste, or vinegar-water mix. Avoid metal brushes—they scratch your grout and tiles. Having everything ready before starting makes the process faster and less frustrating.
Check for damage too. If the grout is crumbling or missing, it might need repair first. Cleaning over damaged grout won't give good results. Use protective gloves to keep your hands safe from chemicals or scrubbing stress. A little preparation now saves time and frustration later.
- Identify if grout is sanded or unsanded.
- Gather brushes, sponges, gloves, and cleaner.
- Avoid metal brushes that scratch tiles.
- Inspect grout for cracks or missing sections.
Prepare the Shower Surface
Cleaning grout works best when the tiles are ready. Start by removing soap scum, oils, and debris from your shower walls. Use a mild soap or detergent and warm water. Wipe down tiles with a sponge or cloth, paying attention to corners and edges where grime collects. Cleaning the surface first lets your grout cleaner work more effectively.
Next, rinse the area well to remove leftover soap. Wet grout allows paste or liquid cleaners to stick better and penetrate stains. Some people like to spray vinegar or hydrogen peroxide lightly over the tiles as an extra pre-treatment. It softens dirt and mildew without harsh abrasion. Be careful with natural stone tiles—acidic sprays can damage them.
If you want, wear an old shirt or apron. Cleaning grout can splash, and protecting clothing keeps the process more relaxed. Open windows or use ventilation if possible. Fresh air helps you avoid inhaling fumes and makes scrubbing less tiring.
- Remove soap scum with mild detergent.
- Rinse tiles and grout thoroughly.
- Optional pre-treatment with vinegar or peroxide.
- Protect clothing and ventilate the area.
Apply Cleaner and Let it Sit
Now comes the main part: applying the cleaner. If using a baking soda paste, mix baking soda with water until it forms a thick paste. Apply generously over grout lines with a brush or your fingers. If using a commercial grout cleaner, follow the instructions carefully. Make sure all grout lines are covered evenly.
Let the cleaner sit for at least 10-15 minutes. This gives it time to break down dirt, mildew, and stains. Some tougher stains may need 30 minutes. Don't rush this part—the chemical or natural reaction needs time to work. Use this waiting period to tidy up other areas of the bathroom or gather tools for scrubbing.
For very stubborn stains, multiple applications may be needed. Patience is key. Avoid over-saturating tiles, as excess liquid can seep under and weaken grout. A little care now prevents future damage.
- Apply baking soda paste or commercial cleaner.
- Cover all grout lines evenly.
- Let sit 10–30 minutes depending on stain severity.
- Avoid over-saturating tiles to prevent damage.
Scrub the Grout Gently
After letting the cleaner work, it's time to scrub. Use a soft brush, old toothbrush, or grout-specific brush. Start from the top of your shower and work your way down. Scrubbing in small sections ensures you cover every line without missing spots. Apply gentle pressure to lift grime without scratching tiles.
For tough stains, you may need to scrub a little harder or apply more paste. Take short breaks if your hands get tired. Sometimes, using a circular motion helps loosen dirt faster than straight strokes. Rinse your brush often to avoid spreading dirt back onto the grout.
Remember, consistency is more effective than brute force. Small, steady strokes remove stains safely. After scrubbing, wipe down tiles with a sponge or damp cloth to remove loosened grime and cleaner residues. Rinse thoroughly before moving on to the next section.
- Use a soft brush or toothbrush.
- Scrub in small, top-to-bottom sections.
- Apply gentle pressure to avoid scratching.
- Rinse frequently to remove loosened dirt.
See Also: Best Way to Clean Stainless Steel Appliances Without Streaking: Tips, Tricks, and Expert Advice
Rinse and Dry Thoroughly
Once scrubbing is complete, rinse the shower thoroughly with warm water. Make sure all cleaner, paste, or residue is washed away. Residue left behind can attract dirt or cause discoloration over time. A handheld showerhead works best, but a bucket of water works too.
After rinsing, dry tiles and grout with a clean towel. Excess moisture can promote mold or mildew growth if left for too long. Pay special attention to corners and edges where water often pools. Airflow helps as well, so keep windows open or the fan running to speed up drying.
Some people like to do a final wipe with a microfiber cloth for extra shine. This removes streaks and leaves tiles looking bright and clean. Keeping grout dry after cleaning maintains the work you just did for longer.
- Rinse all tiles and grout thoroughly.
- Dry with a clean towel or cloth.
- Pay attention to corners and edges.
- Use airflow to speed up drying.
Seal Grout for Long-Lasting Clean
Cleaning is one thing, but sealing grout keeps it protected. Grout sealers form a barrier that prevents dirt, water, and mildew from soaking in. Apply sealer with a small brush or sponge along each line. Follow the product instructions carefully for the best results.
Allow the sealer to dry completely, usually several hours. Avoid shower use during this period to ensure the coating sets properly. Proper sealing extends the life of your clean grout and reduces the frequency of deep cleaning sessions. Reapply every 6–12 months depending on use and product instructions.
Sealing also makes future cleaning easier. A wipe with soapy water or vinegar solution is often enough to keep grout looking fresh. It's a small step that saves you a lot of time and effort in the long run.
- Apply grout sealer along each line.
- Allow several hours to dry fully.
- Reapply every 6–12 months.
- Makes future cleaning easier and faster.
Final Thoughts
Cleaning shower grout can seem daunting, but it's completely manageable with the right approach. Identifying your grout type, preparing surfaces, applying cleaner, scrubbing carefully, rinsing thoroughly, and sealing afterward ensures a bright, clean shower. A little patience and regular maintenance keep grout fresh for months. With these methods, your bathroom can look new again, and you'll enjoy a sparkling shower without frustration or stress.
| Task | Tools Needed | Tips | Common Mistakes to Avoid | Frequency |
|---|---|---|---|---|
| Identify grout type | Magnifying glass, gloves | Check sanded vs unsanded grout | Assuming all grout is the same | Every cleaning session |
| Prepare surface | Sponge, mild detergent | Remove soap scum and debris first | Skipping surface cleaning | Each deep clean |
| Apply cleaner | Baking soda, vinegar, commercial cleaner, brush | Cover all grout lines evenly | Using too much or too little cleaner | Each cleaning session |
| Scrub grout | Toothbrush, soft brush | Focus on small sections, use gentle pressure | Scrubbing too hard and scratching tiles | Each cleaning session |
| Rinse & dry | Warm water, towels, microfiber cloth | Make sure corners and edges are dry | Leaving cleaner residue or excess water | After each cleaning |
| Seal grout | Grout sealer, small brush | Reapply every 6–12 months | Skipping sealing or applying unevenly | Every 6–12 months |
Frequently Asked Questions (FAQs)
Is it safe to use bleach on shower grout?
Yes, bleach can be used on some grout types, but it must be handled carefully. Wear gloves and ventilate the bathroom. Bleach works well on mold or mildew, but it can weaken grout if used excessively. Avoid using it on colored or delicate grout, as it can cause discoloration. Mix with water before applying, and never mix bleach with vinegar or ammonia. Use a soft brush to scrub lightly, rinse thoroughly, and dry to prevent lingering chemicals.
Can I use vinegar on all types of grout?
Vinegar is effective on many grout types, especially for removing soap scum and mild mildew. However, it is acidic and can damage natural stone tiles like marble or limestone. Test a small area first. For ceramic or porcelain tiles, vinegar mixed with water works well. Apply, let sit for a few minutes, scrub gently, and rinse thoroughly. Avoid long contact with grout to prevent weakening. Vinegar is a safe, affordable cleaner if used cautiously.
Do I need gloves when cleaning grout?
Yes, gloves are recommended for several reasons. Cleaning agents, whether commercial or natural, can irritate your skin. Scrubbing can also be rough on hands. Gloves protect from chemicals, prevent staining, and make scrubbing more comfortable. Thin disposable gloves are fine for light cleaning, but thicker rubber gloves are better for extended scrubbing. Wearing gloves is a simple step that makes the process safer and easier.
Is it necessary to scrub every grout line manually?
While some automated tools exist, manual scrubbing often gives the best results, especially for tough stains. Small brushes or toothbrushes allow precision in corners and along tile edges. Focusing on small sections ensures thorough cleaning without missing spots. Manual scrubbing also prevents damage that can occur from electric scrubbers if used improperly. Patience and consistency are more effective than speed in grout cleaning.
Can I use baking soda alone on grout?
Baking soda is a gentle, effective cleaner that works on mild stains when mixed with water. Alone, it may remove light dirt and mildew, but tough stains usually need vinegar, hydrogen peroxide, or commercial cleaners. Baking soda paste helps lift dirt and neutralize odors. Apply it, let it sit, scrub gently, and rinse thoroughly. It's safe, affordable, and environmentally friendly, making it ideal for routine maintenance.
Do I have to seal grout after cleaning?
Sealing is highly recommended but not mandatory. It protects grout from water, mildew, and staining. Clean grout absorbs less dirt and stays fresh longer when sealed. Regular sealing reduces the need for deep cleaning. Use a high-quality sealer according to instructions, and reapply every 6–12 months. Sealing is a small step that saves significant effort in the long run.