Painting baseboards can look perfect only when they are clean and smooth. Dirt, grease, and dust can ruin fresh paint fast. Learning how to clean baseboards before painting saves money, improves results, and prevents peeling later. This guide explains every step clearly so anyone can follow and prepare baseboards like a professional without stress with simple tools and clear advice.
Key Takeaways: Remove loose dust using a dry cloth or vacuum brush. Wash surfaces with mild soap and warm water. Rinse residue carefully and wipe dry. Tackle grease using gentle degreaser. Treat mold spots with safe cleaner. Sand lightly to smooth rough areas. Fill cracks with paintable filler. Wipe again before painting. Protect floors and walls. Ensure baseboards feel clean, dry, and smooth to touch for best adhesion and a flawless paint finish every time on all types of baseboards inside homes.
Understanding Why Clean Baseboards Matter Before Painting
Knowing why cleaning is important helps people take the task seriously and do it correctly. Baseboards sit close to floors, so they collect dust, pet hair, food crumbs, and sticky residue. Over time, this buildup becomes thick and hard. When paint goes over dirty baseboards, it cannot stick properly. This causes uneven coverage, bubbles, and peeling that ruins the final look. Paint also shows flaws more clearly on trim, making dirt lines very noticeable.
Another reason cleaning matters is long term durability. Clean surfaces allow paint to bond tightly. This means the painted baseboards stay smooth and fresh longer without cracking. Skipping cleaning can lead to repainting sooner than expected, which costs more money and effort. Clean baseboards also help paint dry evenly, reducing streaks and patchy areas.
Health and cleanliness also play a role. Dust and grime can spread into the air while painting. This may cause breathing discomfort and make the room feel dirty even after painting. Cleaning first keeps the space healthier and more comfortable. It also helps the paint smell fade faster because fewer contaminants are trapped underneath.
Cleaning also reveals hidden damage. Once dirt is gone, cracks, dents, and gaps become visible. This allows proper repairs before painting. Fixing these small issues early leads to a smooth and professional finish. Understanding how to clean baseboards before painting is not only about appearance. It is about preparation, durability, and quality results that last.
- Clean baseboards help paint stick better
- Dirt causes peeling and uneven finish
- Proper cleaning improves paint durability
- Clean surfaces reveal hidden damage
- Health and air quality improve during painting
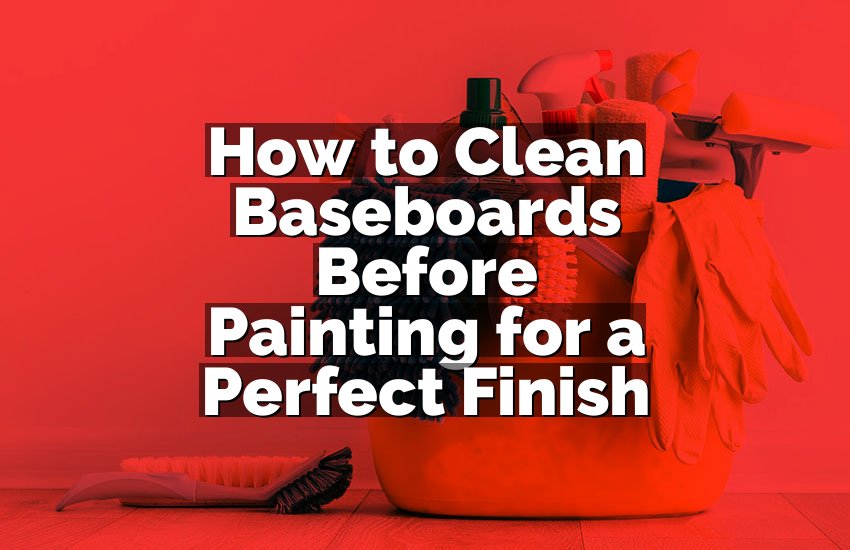
Gathering the Right Tools and Supplies for Cleaning
Having the correct tools makes cleaning baseboards easier and more effective. Many people think expensive products are needed, but simple items work very well. Soft cloths, sponges, and a small bucket are basic tools. A vacuum with a brush attachment helps remove loose dust quickly. Using gentle tools protects the baseboards from scratches or damage.
Cleaning solutions should be mild. Warm water mixed with gentle dish soap is often enough. For greasy areas, a light degreasing cleaner works well. Strong chemicals are not necessary and may damage paint or wood. For mold or mildew, a safe household cleaner designed for these spots is helpful. Always choose products labeled safe for interior surfaces.
Protective items are also important. Gloves keep hands safe from cleaners and dirt. Drop cloths or old towels protect floors from drips and splashes. Painter tape helps cover walls if needed. These small steps prevent extra cleanup later and keep the area neat.
A sanding sponge or fine sandpaper is useful after cleaning. This smooths rough spots and helps paint adhere better. Paintable filler or caulk may be needed for cracks or gaps found during cleaning. A putty knife helps apply filler neatly. Having all supplies ready before starting saves time and avoids interruptions.
When learning how to clean baseboards before painting, preparation is key. Gathering tools first makes the process smooth and stress free. It also ensures every step is done properly without rushing or skipping important tasks.
- Soft cloths and sponges prevent scratches
- Mild soap and warm water work well
- Gentle degreasers handle sticky buildup
- Protective gloves and floor covers help
- Sanding tools and filler support smooth results
Removing Dust and Loose Dirt from Baseboards
The first cleaning step focuses on removing loose dirt and dust. This step is very important because wet cleaning on dusty surfaces creates muddy streaks. Starting dry keeps the process neat and effective. A vacuum with a brush attachment is ideal. It gently lifts dust from corners and edges without scratching the surface.
If a vacuum is not available, a microfiber cloth works well. Microfiber traps dust instead of spreading it. Wipe from one end of the baseboard to the other using smooth motions. Shake or rinse the cloth often to avoid spreading dirt back onto the surface. A small soft brush can help reach decorative grooves or tight spaces.
Pay attention to corners and areas behind furniture. These spots collect the most dust. Moving furniture slightly allows full access and better results. Avoid using rough brushes or stiff tools because they can damage wood or paint. Gentle pressure is enough when dusting.
This dry cleaning step also helps identify problem areas. Sticky spots, stains, or buildup become more visible once loose dirt is gone. These areas can then be treated during wet cleaning. Skipping this step often leads to smeared grime and extra work later.
Understanding how to clean baseboards before painting means following the right order. Dry cleaning first creates a clean base for deeper washing. It saves time and ensures better results with less effort.
- Vacuum or dust baseboards before washing
- Use microfiber cloths for best dust removal
- Clean corners and hidden areas carefully
- Avoid rough tools that cause damage
- Dry cleaning prepares surfaces for wet washing
Deep Cleaning Baseboards with Soap and Water
After removing loose dust, deep cleaning removes stuck on grime and residue. This step uses gentle soap and warm water. Mix a small amount of mild dish soap into a bucket of warm water. Dip a sponge or cloth into the solution and wring it out well. Excess water can damage wood or seep behind trim.
Wipe baseboards using steady motions. Focus on areas near kitchens and bathrooms where grease and moisture are common. If dirt does not come off easily, let the damp cloth sit on the spot briefly, then wipe again. Avoid scrubbing too hard. Gentle pressure works best and prevents surface damage.
Rinse the cloth often in clean water. This keeps dirt from spreading. Change the water if it becomes dirty. After washing, wipe the baseboards with a clean damp cloth to remove soap residue. Soap left behind can affect paint adhesion later.
Drying is important. Use a clean dry towel to wipe the baseboards completely. Moisture trapped under paint can cause bubbling or peeling. Make sure the surface feels dry to the touch before moving on.
For greasy buildup, a gentle degreaser can be used. Apply it carefully and follow product directions. Always rinse afterward. Learning how to clean baseboards before painting includes knowing when simple soap is enough and when extra cleaning is needed.
- Use mild soap and warm water
- Wring cloths well to avoid excess moisture
- Clean greasy areas gently
- Rinse off soap residue completely
- Dry baseboards thoroughly after washing
Handling Stubborn Stains, Grease, and Mold
Some baseboards have tough stains that need special care. Grease, crayon marks, scuffs, and mold spots are common. These stains can bleed through paint if not removed properly. Addressing them before painting ensures a clean and lasting finish.
For grease, a gentle degreaser works best. Apply a small amount to a cloth, not directly on the baseboard. Wipe the area gently until the grease lifts. Rinse with a damp cloth and dry completely. Avoid harsh cleaners that may strip old paint or damage wood.
Scuff marks often come off with a soft sponge or magic style cleaning pad. Use light pressure to prevent dull spots. Crayon marks may require a mild cleaner or baking soda paste. Apply carefully and wipe clean.
Mold or mildew needs special attention. Use a cleaner designed for mold removal that is safe for indoor use. Apply according to instructions and wipe the area clean. Proper cleaning prevents mold from growing under fresh paint, which can cause discoloration later.
Always ensure good ventilation while cleaning tough stains. Open windows if possible. Wear gloves for protection. Learning how to clean baseboards before painting includes knowing how to handle these problem areas safely and effectively.
- Treat grease with gentle degreasers
- Use soft pads for scuff marks
- Remove crayon marks carefully
- Clean mold with safe mold cleaners
- Rinse and dry all treated areas
Final Preparation Steps Before Painting Baseboards
Once cleaning is complete, final preparation ensures perfect painting results. Start by inspecting the baseboards closely. Look for cracks, nail holes, or gaps between the wall and trim. These flaws become more visible after cleaning and should be fixed before painting.
Use paintable filler or caulk to fill small gaps and holes. Apply it smoothly with a putty knife or finger. Remove excess filler to keep the surface even. Allow it to settle according to product instructions. Once set, lightly sand the area to blend it with the rest of the baseboard.
Sanding also helps paint adhere better. Use fine sandpaper or a sanding sponge. Lightly sand the entire baseboard surface. This removes shine and smooths imperfections. Wipe away sanding dust with a clean damp cloth, then dry completely.
Protect surrounding areas before painting. Apply painter tape along walls and floors if needed. Place drop cloths to protect flooring. These steps keep paint lines clean and prevent mess.
The final check is touch. Baseboards should feel clean, smooth, and dry. No dust or residue should remain. Learning how to clean baseboards before painting ends with careful preparation. These final steps make painting easier and results more professional.
- Inspect baseboards for damage
- Fill cracks and holes smoothly
- Lightly sand for better paint adhesion
- Remove sanding dust completely
- Protect walls and floors before painting
Final Thoughts
Cleaning baseboards before painting is a simple but important process. Each step builds toward a smooth and lasting finish. Proper cleaning improves paint adhesion, appearance, and durability. With basic tools and gentle methods, anyone can prepare baseboards successfully. Following these steps carefully helps achieve clean lines and professional results that make any room look fresh and well maintained.
| Cleaning Task | Recommended Tool or Product | Purpose |
|---|---|---|
| Dust removal | Vacuum with brush or microfiber cloth | Removes loose dirt and debris |
| General washing | Mild soap and warm water | Cleans surface grime |
| Grease removal | Gentle degreaser | Lifts sticky residue |
| Mold treatment | Safe mold cleaner | Prevents paint discoloration |
| Surface smoothing | Fine sandpaper or sanding sponge | Improves paint adhesion |
| Repairs | Paintable filler or caulk | Fixes cracks and gaps |
Frequently Asked Questions (FAQs)
Is it necessary to clean baseboards before painting?
Cleaning baseboards before painting is very important for good results. Dirt, dust, and grease stop paint from sticking properly. When paint cannot bond to the surface, it may peel, bubble, or look uneven. Cleaning removes these problems and creates a smooth surface. It also helps the paint color look even and bright. Skipping this step often leads to poor results and the need for repainting. Clean baseboards help paint last longer and look professional.
Can I paint over dirty baseboards if they look clean?
Even if baseboards look clean, they often have invisible dust or grease. These hidden residues affect paint adhesion. Painting over them can cause streaks and peeling later. Cleaning ensures all dirt is removed, not just what can be seen. A quick wipe may not be enough. Proper cleaning prepares the surface fully. This step saves time and effort in the long run by preventing paint problems and improving the final look.
Do I need special cleaners for baseboards?
Special cleaners are not always required. Mild dish soap and warm water work well for most baseboards. For greasy or stained areas, a gentle degreaser helps. Mold requires a safe mold cleaner. Avoid strong chemicals because they can damage surfaces. Choosing simple and safe products is usually enough. The key is using the right cleaner for the problem without being too harsh on the baseboard material.
Is it safe to use water on wooden baseboards?
Water can be used on wooden baseboards when applied carefully. Cloths should be damp, not dripping wet. Excess water can damage wood or cause swelling. Always wring out cloths well and dry the surface completely after cleaning. Gentle cleaning with controlled moisture is safe and effective. Proper drying prevents problems and prepares the surface for painting without harming the wood.
Can sanding replace cleaning before painting?
Sanding alone does not replace cleaning. Sanding smooths surfaces but does not remove grease or dirt fully. In fact, sanding dirty baseboards can push grime deeper into the surface. Cleaning should always come first. After cleaning and drying, sanding improves paint adhesion. Both steps work together to create a smooth and durable finish.
Do I need to repair baseboards before painting?
Yes, repairs should be done before painting. Cleaning often reveals cracks, holes, or gaps. Painting over these flaws makes them more noticeable. Filling and smoothing them creates a clean look. Repairs help the paint sit evenly and improve appearance. Taking time to fix small issues results in a more polished and professional finish.
Is it okay to skip drying after cleaning?
Drying should never be skipped. Moisture trapped under paint can cause bubbles and peeling. Wet surfaces also prevent paint from sticking properly. Always dry baseboards completely before painting. Using a clean towel helps remove moisture quickly. Ensuring dryness leads to better paint performance and longer lasting results.
Can I clean baseboards after painting instead?
Cleaning after painting does not fix preparation problems. Dirt under paint remains trapped and causes defects. Cleaning after painting only removes surface dust. Proper cleaning must happen before painting to ensure adhesion and smoothness. Preparing first saves time and improves the final outcome. Always clean thoroughly before applying paint.