Cleaning your stainless steel coffee maker isn't just about keeping it shiny—it's essential for maintaining that delicious cup of coffee you love! Whether it's time to deep clean or just freshen things up, understanding the best methods will extend the life of your machine and enhance your brew. So let's dive in and make cleaning your coffee maker as simple and enjoyable as sipping that morning cup!

Why Regular Cleaning of Your Stainless Steel Coffee Maker is Essential
We all love a good cup of coffee, and the last thing we want is a burnt or stale taste because of a dirty machine. Over time, coffee makers can accumulate mineral deposits, coffee oils, and even mold if not properly cleaned. This can affect the taste of your coffee, making it bitter or sour, and sometimes even smell unpleasant. So, why is regular cleaning so crucial?
First off, coffee makers that aren't cleaned often can become breeding grounds for bacteria and mold. Think about it—when you brew a cup of coffee, water heats up inside the machine, and any leftover moisture and oils from the coffee grounds remain inside. If left unchecked, this can lead to unpleasant smells and a build-up of mold. Not only does this affect the taste of your coffee, but it can also be harmful to your health. Regular cleaning is your best defense.
Another important factor is the mineral buildup. Over time, calcium and other minerals from hard water can accumulate inside the coffee maker, especially in the heating elements. This mineral build-up (also known as limescale) can affect the temperature of your coffee and even cause the machine to work less efficiently. By cleaning the machine on a regular basis, you prevent this buildup and ensure that your coffee maker continues to perform at its best.
Cleaning your coffee maker also helps to maintain its longevity. When you take care of your machine, you extend its lifespan and avoid the need for costly repairs or replacements. It’s like giving your coffee maker the TLC it deserves.
So, let's get started with the ultimate guide to cleaning your stainless steel coffee maker!
Step-by-Step Guide to Cleaning Your Stainless Steel Coffee Maker
Cleaning your coffee maker may seem like a daunting task, but it's actually quite simple when you follow a few easy steps. Let's walk through the process, step by step.
Step 1: Gather Your Cleaning Supplies
Before you start, it's important to have everything you need. Here's a simple list of supplies to gather:
- White vinegar (for descaling)
- Baking soda (for general cleaning)
- Soft cloth or sponge
- Dish soap
- Water
- A small brush or toothbrush (for hard-to-reach areas)
- Paper towels
It's best to avoid harsh chemicals because they can leave a residue in your coffee maker. Stick to natural cleaners like vinegar and baking soda, which are effective and safe.
Step 2: Empty the Coffee Maker
Start by making sure your coffee maker is empty. If there's any leftover coffee, pour it out. Make sure there's no coffee grounds left in the filter basket. This is also a good time to remove any reusable filters you might be using and give them a quick rinse.
Step 3: Clean the Exterior of the Coffee Maker
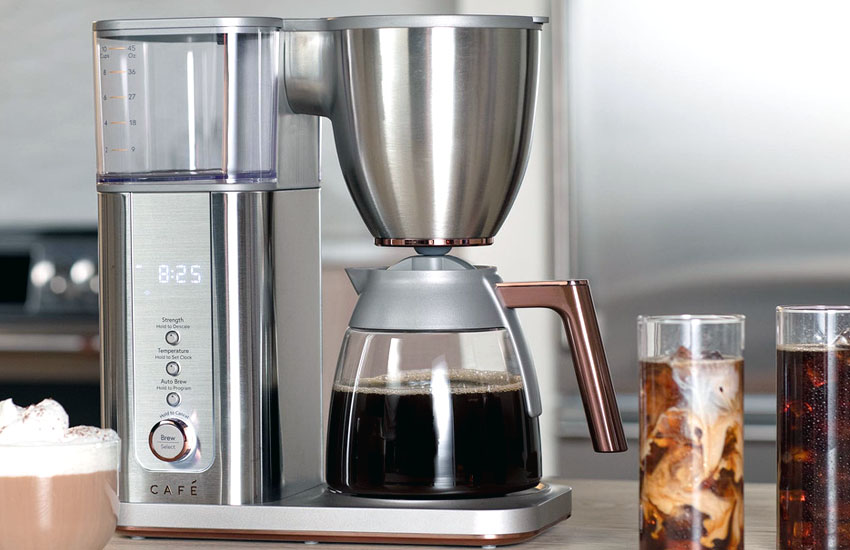
The exterior of your coffee maker is the first place to start. Use a damp cloth and some mild dish soap to gently wipe the surface of your coffee maker. Make sure to clean the stainless steel parts, especially the carafe and the lid. Stainless steel can show fingerprints, so give it a good shine afterward.
You can also use a microfiber cloth for a streak-free shine. Be careful not to use anything abrasive that might scratch the surface of the stainless steel.
Step 4: Descaling Your Coffee Maker
Descaling is a very important step to remove the mineral buildup (limescale) inside your coffee maker. Over time, this buildup can make your coffee taste bad and cause the machine to heat less efficiently.
To descale your coffee maker, fill the water reservoir with equal parts white vinegar and water. For most coffee makers, half a reservoir of vinegar should do the trick. Run the coffee maker as if you were brewing a pot of coffee, but without any coffee grounds in the filter. Let the vinegar solution sit inside the machine for about 15-20 minutes, then run the brew cycle again.
After that, run two or three cycles of clean water through the coffee maker to rinse out any vinegar residue. This will help eliminate the smell and ensure no vinegar flavor is left behind.
Step 5: Clean the Coffee Filter and Basket
The coffee filter and basket tend to collect oils and grounds, which can get stale and impact the taste of your coffee. If you're using a reusable filter, it's best to wash it thoroughly with warm soapy water. A small brush or toothbrush can be useful for scrubbing away any build-up that's difficult to reach.
If you're using paper filters, make sure to throw away the used filter and rinse the basket with warm water to remove any leftover coffee residue.
Step 6: Clean the Carafe and Water Reservoir
The carafe and the water reservoir can also accumulate oils and other residues. Give the carafe a good wash with warm water and dish soap. A sponge or brush can help scrub away stubborn stains. For the water reservoir, simply wipe it down with a soft cloth, or use a sponge with a little dish soap. Make sure there are no soap residues left behind before you start using the coffee maker again.
Step 7: Dry All Parts Thoroughly
After everything is cleaned, it's important to dry all parts thoroughly before reassembling your coffee maker. This helps prevent any moisture from lingering inside and causing mold or mildew. Use paper towels or a clean cloth to wipe away any water.
Step 8: Reassemble and Test
Now that everything is clean and dry, you can put your coffee maker back together. Run a test brew with just water to make sure everything is working correctly and that no vinegar or soap residue remains.
Congratulations, your coffee maker is now clean and ready for use! With regular cleaning, your machine will last longer and your coffee will always taste fresh.
Deep Cleaning Tips for Stainless Steel Coffee Makers
If you want to take your cleaning routine to the next level, a deep clean can really make a difference. A deep clean is recommended every few months to ensure your coffee maker stays in top condition.
Removing Stubborn Stains
If your stainless steel coffee maker has stubborn stains or marks, there are a few tricks you can try. One effective method is using baking soda. Make a paste by mixing baking soda with a small amount of water, and gently scrub the stains with a soft cloth or sponge. The mild abrasiveness of baking soda helps lift the stains without scratching the stainless steel.
For even tougher stains, try using a mixture of equal parts vinegar and baking soda. Let the paste sit on the stain for a few minutes, then scrub gently. This method can work wonders for removing rust or mineral deposits.
Cleaning the Coffee Maker's Interior
While descaling removes mineral buildup in the water reservoir, there can still be residue inside the internal components of your coffee maker. One way to clean the internal parts is by running a mixture of water and vinegar through the brew cycle. Afterward, run several cycles of water to flush out any remaining vinegar or debris.
Another trick is to use a coffee maker cleaning solution, which you can find at most kitchen stores or online. These solutions are designed to break down oils and mineral deposits inside the coffee maker. Always follow the manufacturer’s instructions when using these products.
Cleaning the Carafe's Spout
Sometimes coffee can drip down the spout of your carafe, leaving behind dried coffee stains that are hard to clean. To fix this, dip a cloth in warm water mixed with a little dish soap and carefully clean the spout area. A cotton swab can also be useful to get into tight spots.
Check the Water Filter
If your coffee maker uses a water filter, be sure to replace it regularly according to the manufacturer's instructions. A clogged or dirty filter can affect the taste of your coffee and cause your machine to work harder.
Maintaining Your Stainless Steel Coffee Maker for Longevity
Proper maintenance is key to making sure your coffee maker lasts as long as possible. Here are some tips to help you maintain your machine:
Use Filtered Water
Using filtered water can help reduce the buildup of minerals in your coffee maker. Tap water often contains minerals like calcium, which can contribute to limescale. By using filtered or distilled water, you'll cut down on the need for frequent descaling.
Clean After Every Use
While a deep clean is necessary every month, it's important to do a quick clean after each use. Empty the coffee grounds and rinse the carafe and filter basket. This will prevent oil and residue from building up and making cleaning harder later on.
Store Properly
When you're not using your coffee maker, store it in a dry area. Don't leave it with the lid or filter basket open, as this can invite dust and moisture inside. Proper storage helps keep it clean for the next time you brew.
I hope this guide makes cleaning your stainless steel coffee maker easier than you expected! With just a little regular care, your coffee maker will stay in top condition, and your coffee will always taste fresh. Happy brewing!
Frequently Asked Questions
Is it safe to use vinegar to clean my coffee maker?
Yes, vinegar is an excellent natural cleaner for coffee makers. It helps remove mineral buildup and sanitize the machine, leaving your coffee maker ready for use.
Can I use bleach to clean my stainless steel coffee maker?
It's not recommended to use bleach in your coffee maker as it can leave harmful residues. Stick to vinegar or baking soda for safer cleaning.
Do I need to clean the filter basket after each use?
Yes, it's important to clean the filter basket after every use to remove any leftover coffee grounds and oils. This helps prevent mold and residue buildup.
Is it okay to use tap water in my coffee maker?
While tap water is fine, filtered water is better for reducing mineral buildup and improving the taste of your coffee.
Can I clean my coffee maker with a dishwasher?
Some coffee maker parts are dishwasher-safe, like the carafe and filter basket. However, it's best to consult the manufacturer's instructions before putting anything in the dishwasher.
Do I need to clean my coffee maker if I don't use it every day?
Even if you don't use your coffee maker daily, regular cleaning is still important to prevent mold and mineral buildup.
Is it necessary to descale my coffee maker?
Yes, descaling removes mineral deposits that can affect the taste of your coffee and the efficiency of your coffee maker. Descale it regularly, especially if you have hard water.
Can I use baking soda to clean my coffee maker?
Yes, baking soda is a great natural cleaner for removing stains and odors from your coffee maker. It's gentle on the stainless steel and effective for general cleaning.