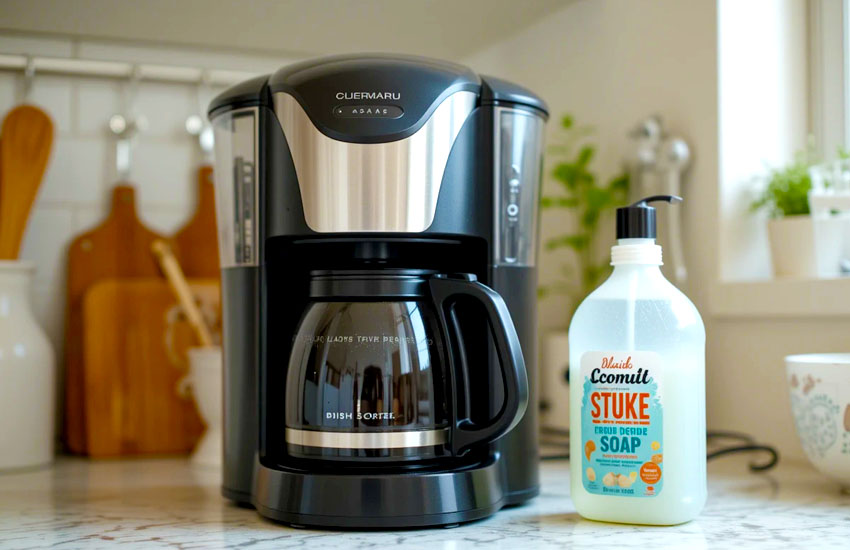
If your coffee maker is starting to feel a little grimy, it's time to give it a good clean. Cleaning your coffee maker is essential for keeping your coffee tasting fresh, and the good news is—you don't need to use fancy products to get the job done! In this guide, I'll show you how to clean your coffee maker with simple dish soap. Let's make this process easy, fun, and a lot less intimidating!

Why Cleaning Your Coffee Maker with Dish Soap is a Smart Idea
You might be wondering—why dish soap? Why not just grab some fancy cleaner from the store? The answer is simple. Dish soap is mild, effective, and safe for cleaning your coffee maker without leaving harmful residues behind. Using dish soap is one of the easiest ways to maintain your coffee maker, keep it looking fresh, and ensure your cup of coffee always tastes great.
Over time, coffee makers can accumulate a build-up of oils, coffee grounds, and mineral deposits. These residues can affect the taste of your coffee, create unpleasant odors, and even damage your coffee maker if left unchecked. Regular cleaning with dish soap will help remove these build-ups, ensuring that your coffee machine stays in top shape and your coffee always tastes like it should.
One of the best things about dish soap is its gentle cleaning action. Unlike harsh chemicals that could potentially damage the internal components of your coffee maker, dish soap works without any risk of causing harm. This makes it perfect for deep cleaning the carafe, filter basket, and even the machine's exterior.
Another important benefit is that dish soap is easily available, affordable, and safe to use. You probably already have some in your kitchen, which makes it an easy solution for a quick coffee maker clean-up. Plus, it's gentle enough to use regularly, so you won't have to worry about damaging the machine with frequent cleanings.
Now, let's take a look at the step-by-step process for cleaning your coffee maker with dish soap, starting from the very basics!
Step-by-Step Guide to Cleaning Your Coffee Maker with Dish Soap
Cleaning your coffee maker with dish soap is a simple process, but it's important to be thorough to ensure that every part of your machine is cleaned properly. Let's break down the process into easy-to-follow steps.
Step 1: Gather Your Cleaning Supplies
Before you get started, make sure you have all the supplies you need. Here's what you'll need:
- Dish soap (any mild liquid dish soap)
- A soft sponge or cloth
- Paper towels or a dry cloth for drying
- Warm water
- A small brush or toothbrush (optional)
- A sink or basin
You don't need anything fancy, just basic cleaning supplies that are easy to find around the house. Dish soap is perfect for this task because it's gentle and effective at breaking down oils and grime.
Step 2: Empty the Coffee Maker
Before you start cleaning, make sure your coffee maker is empty. Remove any leftover coffee from the carafe and discard any coffee grounds from the filter basket. If you're using a reusable filter, take it out and rinse it thoroughly with warm water to get rid of any remaining grounds.
Step 3: Clean the Carafe
The carafe is one of the most important parts of your coffee maker. It collects all the coffee and oils, so it's essential to keep it clean. Start by washing it with warm water and dish soap.
Add a few drops of dish soap to the carafe and use a sponge or cloth to scrub it gently. If there are any stubborn coffee stains or oils that have built up over time, use a small brush or toothbrush to scrub the inside of the carafe. Make sure to pay special attention to the spout area, as this can collect drips and stains.
Rinse the carafe thoroughly with warm water to remove all soap residue. You don't want any soapy taste lingering in your coffee, so be sure to rinse it well. Dry the carafe with a clean towel or let it air dry.
Step 4: Clean the Filter Basket
Next, it's time to clean the filter basket. Whether you're using a paper filter or a reusable filter, this part of the coffee maker tends to collect oils and debris. Begin by removing any old coffee grounds and disposing of the paper filter if you're using one.
If you have a reusable filter, wash it with warm water and dish soap. You can use a small brush or a toothbrush to scrub the filter gently, making sure all the coffee oils and residues are removed. If the filter has stubborn stains, try soaking it in warm soapy water for a few minutes before scrubbing.
Rinse the filter basket well with warm water to remove any soap or coffee residue, then dry it with a clean cloth or paper towels. This will help prevent any leftover moisture from causing mold or mildew.
Step 5: Clean the Coffee Maker's Exterior
Now that the interior parts are cleaned, it's time to focus on the exterior. Use a damp cloth with a small amount of dish soap to wipe down the outside of your coffee maker. Pay attention to any areas where oils or fingerprints may have left marks, especially around the buttons and handles. Be gentle with the surface to avoid any scratching.
Once you've wiped down the entire exterior, use a clean, dry cloth to give it a nice shine. This will help your coffee maker look brand new and keep it free from grime.
Step 6: Clean the Water Reservoir
The water reservoir is another key part of your coffee maker that needs attention. While you may not think about it as much, this part can still accumulate residue over time. To clean it, just fill it with warm water and a few drops of dish soap. Use a sponge or cloth to wipe down the inside of the reservoir, paying special attention to any areas with build-up.
Once you've cleaned the reservoir, rinse it thoroughly with clean water to remove all soap residue. You don't want any soap taste affecting your coffee, so be sure to rinse well.
Step 7: Run a Clean Water Cycle
To make sure your coffee maker is fully clean, run a cycle with just water. Fill the water reservoir with clean water and run the machine as if you were brewing coffee. This will help remove any lingering soap or cleaning residue from inside the machine.
Once the cycle is finished, run another cycle with clean water to ensure that no soap or cleaning agent is left behind. This step is crucial for making sure your next cup of coffee doesn't taste soapy!
Step 8: Dry and Reassemble
After all parts are cleaned and rinsed, let them dry thoroughly before reassembling your coffee maker. Use a dry cloth or paper towel to wipe off any excess water, and make sure the machine is fully dry before you put everything back together.
Once everything is dry, you can reassemble your coffee maker and it will be ready for use!
Deep Cleaning Your Coffee Maker with Dish Soap
If you've been using your coffee maker for a while without cleaning it thoroughly, it may be time for a deeper clean. Deep cleaning is essential to get rid of built-up oils, mineral deposits, and other grime that can affect the taste of your coffee.
Clean the Coffee Maker's Heating Element
One area that often gets overlooked is the heating element inside the coffee maker. Over time, mineral deposits can build up here, causing the machine to work less efficiently. To clean this area, fill the water reservoir with equal parts water and vinegar and run a brew cycle. The vinegar will help break down mineral deposits and scale.
After the cycle is complete, let the vinegar sit in the machine for 10-15 minutes. Then, run several cycles with clean water to rinse out the vinegar and any debris.
Use Baking Soda for Tough Stains
If you notice stubborn stains inside your coffee maker or carafe, try using baking soda in addition to dish soap. Baking soda is a natural abrasive and can help scrub away tough stains without scratching the surface. Mix a small amount of baking soda with water and use a sponge to clean any problem areas.
Baking soda can also help with odors. If your coffee maker has a lingering smell, sprinkle a small amount of baking soda inside the carafe or water reservoir and let it sit for a few hours before rinsing it out.
Don't Forget the Drip Tray and Coffee Pot Lid
The drip tray and coffee pot lid can also collect grime and residue. Be sure to clean these parts with warm water and dish soap. A small brush can be helpful to reach into tight spaces, especially around the edges of the lid.
Maintaining Your Coffee Maker for Long-Term Performance
Regular cleaning is key to keeping your coffee maker in great shape for years to come. Here are some tips for maintaining your coffee maker's performance:
- Clean regularly: Clean your coffee maker every 1-2 weeks to prevent the build-up of oils and minerals.
- Descale periodically: Descaling your coffee maker every few months helps remove mineral deposits.
- Use filtered water: If possible, use filtered water to reduce mineral buildup and improve the taste of your coffee.
- Store properly: When not in use, make sure your coffee maker is stored in a dry area, and leave the lid or filter basket open to prevent moisture buildup.
I hope this guide helps you keep your coffee maker in top shape! With just a little dish soap and regular cleaning, your machine will keep making delicious coffee for years to come. Enjoy your fresh, clean coffee maker!

Frequently Asked Questions
Is it safe to use dish soap to clean my coffee maker?
Yes, dish soap is safe and effective for cleaning your coffee maker. It helps remove oils and residue without damaging the machine.
Can I use any type of dish soap to clean my coffee maker?
It's best to use a mild dish soap to avoid harsh chemicals. Avoid using strong detergents or products with added fragrances.
Do I need to clean my coffee maker if I don't use it every day?
Even if you don't use your coffee maker daily, it's important to clean it regularly to prevent residue buildup and mold growth.
Is it okay to run vinegar through my coffee maker for cleaning?
Yes, vinegar is an effective natural cleaner that helps remove mineral buildup and sanitize the machine. Just make sure to rinse it well afterward.
Can I put my coffee maker in the dishwasher?
Most coffee makers have parts that are dishwasher-safe, like the carafe and filter basket. However, always check the manufacturer's instructions to be sure.
Do I need to replace my coffee maker's water filter regularly?
Yes, if your coffee maker has a water filter, it's important to replace it according to the manufacturer's guidelines to ensure the best taste and performance.
Is it necessary to clean the heating element of my coffee maker?
Yes, cleaning the heating element every few months helps remove mineral deposits that can affect the machine's efficiency.
Can I use baking soda to clean my coffee maker?
Yes, baking soda can be used to clean tough stains and odors. It's gentle on the machine but effective at cleaning and deodorizing.