Sometimes, cleaning walls feels like a never-ending chore. You try wiping with a rag, but stains keep coming back. The floors look shiny, but the walls? Not so much. That's when the O Cedar mop comes to the rescue, making things faster and less tiring. In this article, we'll show exactly how to clean walls with O Cedar mop so you get sparkling results every time.
Key Takeaways
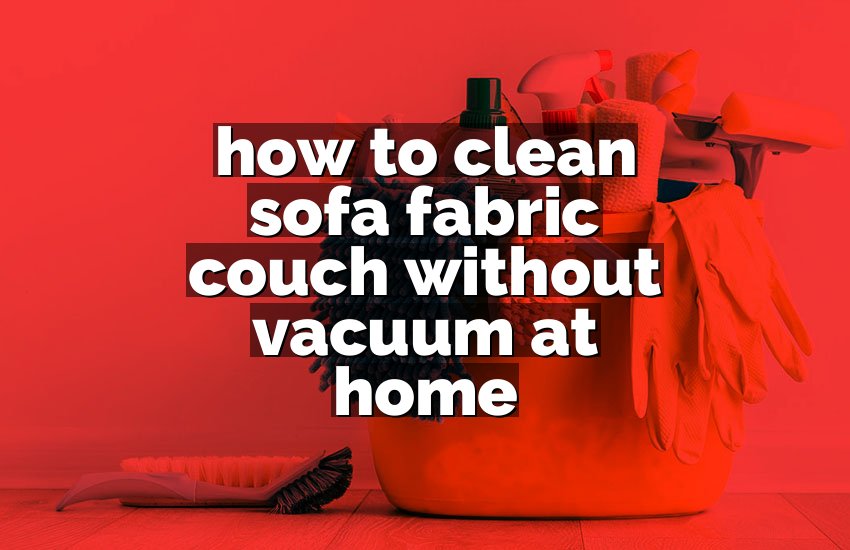
Prepare your walls and remove dust using a dry O Cedar mop. Mix warm water with mild soap and lightly dampen the mop. Start cleaning from top to bottom, moving slowly and gently. Rinse the mop frequently to avoid streaks. Focus on corners and edges for thorough cleaning. Let walls air dry and inspect for missed spots. Repeat if needed for tough stains. Store the mop properly to maintain its efficiency.
Gather Your Cleaning Supplies
Before you start, having the right tools makes all the difference. Grab your O Cedar mop, a bucket, mild detergent, and some clean water. It's easy to forget something, like a small microfiber cloth for corners. I once started without it, and scraping dust from edges became a tiny nightmare. Preparing everything first saves time and avoids unnecessary trips back and forth.
Mixing your cleaning solution is the next small trick. Warm water with just a little soap works best. Too much detergent can leave streaks, and too little won't clean properly. Sometimes I wonder if people think walls need harsh chemicals—honestly, they rarely do. Keep it gentle but effective.
Check the room carefully before you mop. Remove any small furniture or cover it with a cloth. A coffee table can easily get splashed with soapy water, trust me. Also, inspect walls for cracks or peeling paint. If water touches those spots, it can make things worse. Preparing the room properly really helps your final results.
Finally, make sure your mop pad is clean and ready. O Cedar pads are reusable, but a dirty pad just spreads grime. I've learned the hard way that a fresh pad makes cleaning almost effortless. Think of it like having clean hands before cooking—everything goes smoother.
- Gather O Cedar mop, bucket, soap, and cloth
- Mix warm water with mild detergent
- Move furniture and inspect walls
- Use a clean mop pad
Dust and Pre-Clean the Walls
Starting with dusting is more important than many realize. Dust clings to walls like stubborn stickers. Using your O Cedar mop dry first removes loose dirt without scratching the paint. I usually imagine the walls are giant canvases; dust ruins the picture if not gone first. A quick sweep can save hours later.
Corners and edges often hide tiny dust bunnies. Using the mop carefully, slide along corners and around switch plates. I always think, "Who knew walls had so much dust hiding in plain sight?" Being thorough now makes wet cleaning far easier. A little patience goes a long way.
Ceiling edges and the tops of doors also collect dust. Many people forget these spots. I once got a surprise streak after ignoring the top of a door frame. A small ladder or step stool works wonders here. Take your time—it's a small step that makes the whole room feel cleaner.
Finally, after dusting, check for sticky spots or marks. A damp microfiber cloth works for stubborn spots before wet mopping. This extra touch prevents spreading dirt around later. Sometimes I feel like a detective spotting hidden marks. Preparation really pays off.
- Dust with dry mop first
- Focus on corners, edges, and switch plates
- Clean ceiling edges and door tops
- Spot-clean sticky marks
Prepare the Mop and Cleaning Solution
The O Cedar mop is versatile, but it works best with proper prep. Start by filling a bucket with warm water. Add a few drops of mild soap. Too much soap can leave streaks, and too little won't clean effectively. I always remember one time using a strong cleaner—it left the wall sticky for days.
Dampen the mop pad slightly, not soaking wet. Squeezing excess water prevents drips and streaks. I once overfilled my mop, and the wall looked like it was raining indoors. Controlling moisture is key for smooth cleaning. The goal is gentle and even.
Wring the mop frequently during cleaning. Even a small amount of dirt can smear quickly. I usually think of the mop pad like a sponge for a spill—rinse often and it stays effective. A clean pad makes the whole process faster and better.
Test a small hidden area first. Sometimes paint reacts differently to water or soap. I learned this the hard way in a guest room—it left faint marks on glossy paint. A tiny test prevents big surprises later. After this, you're ready to start cleaning with confidence.
- Fill bucket with warm water and mild soap
- Slightly dampen mop pad
- Wring mop frequently
- Test on a hidden wall area
Clean Walls from Top to Bottom
Always start cleaning from the top. Gravity helps avoid streaks from drips running down. I often imagine the mop gliding down like a waterfall, leaving a clean path behind. Top-to-bottom cleaning keeps the walls consistent and streak-free.
Move the mop slowly and gently. Rushing creates streaks and missed spots. I remember trying to finish fast once and regretted it when the walls looked blotchy. Slow and steady works wonders. Pay attention to pressure—too hard can damage paint.
Overlap each section slightly. This technique avoids gaps and ensures a uniform clean. I usually whisper to myself, "Cover every inch," as I move along the wall. Small overlapping strokes make the results professional. Patience here really shows in the final shine.
After each pass, rinse the mop. Dirty mop pads make cleaning harder, not easier. I've noticed that rinsing frequently makes the process smoother and faster. Treat the mop like a friend helping you—keep it clean and it helps back.
- Start from top and move down
- Use slow, gentle strokes
- Slightly overlap sections
- Rinse mop often
Focus on Stubborn Stains
Some walls have tricky spots like crayon marks or fingerprints. The O Cedar mop works well if you give extra attention. Damp the mop slightly and apply gentle pressure. I've had kids' walls with magic marker—slow scrubbing makes them vanish without chemicals.
For greasy spots near kitchens, a bit more soap helps. I usually use warm water first, then a tiny extra detergent for grease. A little patience prevents scrubbing too hard and damaging paint. Quick fixes rarely work here.
Corners, baseboards, and switch plates often hide stubborn stains. I use the mop carefully around edges and sometimes a small brush. I find it satisfying when a hidden stain disappears—it's like a mini win. These small areas need gentle care.
After stubborn spots are clean, rinse the mop again. Leaving soap residue can leave streaks or attract more dirt. I like to imagine the wall smiling after a fresh rinse. Clean water makes all the difference.
- Damp mop gently for tough stains
- Use extra soap for greasy areas
- Pay attention to corners and edges
- Rinse after cleaning spots
Dry and Inspect Walls
After cleaning, let the walls air dry naturally. I often open windows for fresh air and faster drying. A dry wall shows any missed spots clearly. Sometimes I notice tiny streaks I missed while wet.
Check carefully once the wall is dry. I move around and tilt my head—small streaks become obvious. It's like inspecting a freshly polished car; details matter. Sometimes I go back with a damp cloth for a final touch.
Store your O Cedar mop properly. Wash the pad, let it dry, and keep it ready for next time. I've ruined mop pads by leaving them wet—lesson learned. Proper storage keeps it effective and extends its life.
Finally, enjoy your sparkling walls! The effort pays off, and the room feels fresher. I always step back and smile—clean walls really make a difference. Small daily care keeps it easier next time.
- Let walls air dry
- Inspect for missed spots
- Wash and store mop properly
- Enjoy clean, fresh walls
Final Thoughts
Cleaning walls with an O Cedar mop is easier than most people think. It saves time, prevents streaks, and keeps walls looking fresh. A few tips like prepping, gentle cleaning, and checking edges make a big difference. With practice, it becomes almost effortless. A little care goes a long way in keeping your walls spotless and bright.
| Task | Tip | Extra Advice |
|---|---|---|
| Gather Supplies | Use mild soap and warm water | Avoid harsh chemicals |
| Dust Walls | Dry mop first | Focus on corners and edges |
| Prepare Mop | Slightly dampen pad | Test on hidden area |
| Clean Walls | Top to bottom motion | Overlap sections |
| Stubborn Stains | Apply gentle pressure | Extra soap for grease |
| Dry Walls | Air dry | Open windows for faster drying |
| Inspect | Check for streaks | Touch-up missed spots |
| Store Mop | Wash and dry pad | Keep in a clean place |
Frequently Asked Questions (FAQs)
Is it safe to use O Cedar mop on all wall paints?
Yes, most wall paints are safe with the O Cedar mop. However, delicate or glossy paints may need a test spot first. Using mild soap and dampening lightly prevents damage. I often test in a corner before the main cleaning. Even water-sensitive paint usually handles gentle wiping without issues. Always avoid soaking the wall, as excess water can peel paint or cause streaks.
Can I use O Cedar mop for textured walls?
Absolutely, but gently. Textured walls can trap dust, so a dry mop first works best. Dampen slightly for cleaning, and use slow, careful motions. For deep textures, a small brush or microfiber cloth helps reach crevices. I like to imagine each bump as a tiny hill—patience clears them all. Avoid scrubbing too hard to prevent paint damage.
Do I need special cleaning solutions for O Cedar mop?
No special solution is needed. Mild soap with warm water works best. Strong chemicals can leave residue or damage paint. I usually use a few drops of dish soap in a bucket. This combination cleans efficiently without extra fuss. Simple solutions are often the most effective.
Is it okay to leave walls wet after cleaning?
Walls should air dry, but avoid prolonged dampness. Excess water can cause streaks or paint issues. I often open windows or use fans for faster drying. A quick inspection after drying shows any spots needing touch-up. Proper drying ensures a smooth, clean finish.
Can O Cedar mop remove crayon or marker stains?
Yes, with gentle pressure. Dampen the mop slightly and scrub carefully. For tough stains, a bit of extra soap helps. I once removed a child's marker masterpiece from a wall using this method. Slow, steady cleaning prevents paint damage.
Do I need to rinse the mop frequently?
Yes, rinsing prevents dirt from spreading. I usually rinse every few strokes. Dirty mop pads make cleaning harder and streaky. Treating the mop like a tool keeps it effective. Clean water ensures clean walls.
Is it necessary to remove furniture before cleaning?
It's recommended to move or cover furniture. This prevents accidental splashes and gives full access. I've learned moving just a small coffee table makes a big difference. A little prep avoids frustration later.
Can I reuse the O Cedar mop pad?
Yes, pads are reusable if washed properly. Rinse thoroughly and let it dry completely. I usually store mine in a clean place. Proper care extends the pad's life and maintains cleaning efficiency. A fresh pad always works better.